
LCD mounting is an often unthought of aspect when it comes to display integration and design. While VESA standard mountings were defined by the display industry to create a practical system of materials and measurements, more and more designers are finding ways to integrate their displays in unique and elegant ways.
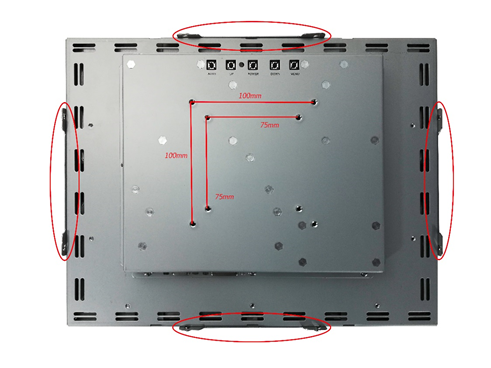
The most familiar mounting option to industrial consumers is the VESA standard. The VESA standard is commonly seen as the 4-hole pattern that can be found (for example) on the back of many commercial LCD TVs. However, the VESA standard also includes specifications for edge-mount displays, as well as off-center configurations. VESA is the mounting option used most often by display manufactures and allows the near universality of the various wall hangers, swing arms, and desktop stands available on the market. The VESA mounting option considers the display’s size and weight to determine the overall dimensions of the bolt pattern, as well as the size and thread depth of the required bolts. Using these measurements and materials ensures the safe application of a display to its mount.
| VESA Standard | Hole Pattern | Screw Size | Monitor Weight | Screen Size |
| FDMI MIS-B | 50 x 20 mm | M4 x 6 mm | ≤ 4.4 lbs / ≤ 2 kg | 4″ to 7.9″ |
| FDMI MIS-C | 75 x 35 mm | M4 x 8 mm | ≤ 10 lbs / ≤ 4.5 kg | 8″ to 11.9″ |
| FDMI MIS-D | 75 x 75 or 100 x 100 mm | M4 x 10 mm | ≤ 30.8 lbs / ≤ 14 kg | 12″ to 23.9″ |
| FDMI MIS-E | 200 x 100 mm | M4 x 10 mm | ≤ 50 lbs / ≤ 23.7 kg | 24″ to 30.9″ |
| FDMI MIS-F | 200 mm increments |
M6 x 8 mm or 10 mm; M8 x 15 mm | ≤ 250 lbs / ≤ 113.6 kg | ≥ 31″ |
While consumer mounting options almost always offer a VESA component, industrial display designers may encounter challenges where VESA mounting isn’t always practical. Displays for applications like HMI (Human Machine Interface) control are often limited by size restrictions, material cost, or aesthetic limitations. One common design, termed “Panel Mount,” is a mounting method in which a display is mounted flush with the exterior of the enclosure it is allotted. To do this, high-bond adhesives like 3M VHB are often applied to the LCD directly and then adhered the opening point of the enclosure. Some of the benefits of using an adhesive, or tape bond, type of mount are: weatherproof durability – high-bond tape is minimally affected by moisture and direct sunlight; vibration resistance – the flexible nature of the tape allows for vibration absorption; and stress distribution – a perimeter bond evenly distributes weight around the edges of the mount. Adhesive bonds also eliminate the need for drilling and allow the mating of dissimilar materials such as glass to metal, or plastic to wood.
Other designs may include custom frames and bezels that hide mounting points by blending them into the surrounding structure, or glass overhangs which are bonded to the display and can be recessed into the opening. AGDisplays’ engineers frequently create custom metalwork that is unique the individual LCD and application. To do this AGDisplays works hand in hand with our customers to ensure we understand fully their design challenges, as well as to offer our experience creating custom display mounting options across multiple industries.
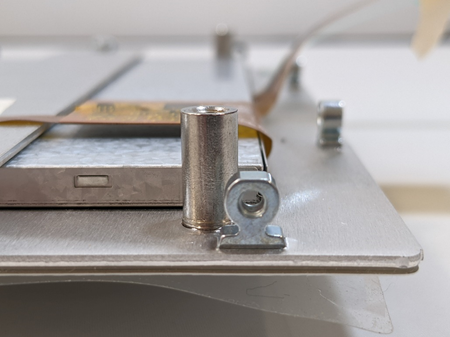
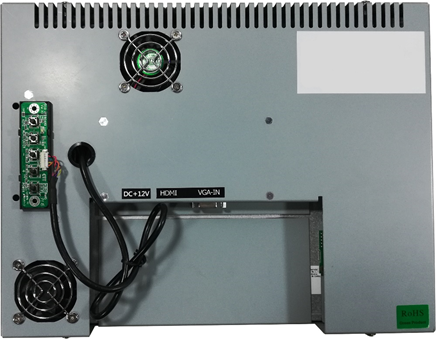
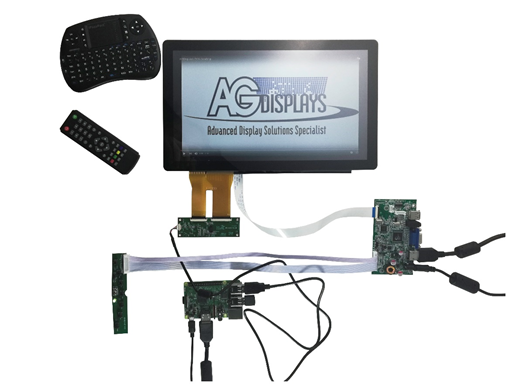
Beyond display mounting considerations, it should be noted that accompanying components will need their own mounting solutions as well. Many AGDisplays designs call for extra included electronics like LED controllers, touchscreen controllers, and cables, as well as single board computers like the Raspberry Pi. These types of components are generally mounted on the rear of the display using either mechanical standoffs, or adhesive high-bond material. Considering factors like potential electromagnetic interference, and the application environment, AGDisplays mounts components in logical and functional patterns. Even so, component mounting options are occasionally limited by cable length and available space.
If you are unsure of how a display and components will fit in your enclosure, or if you are looking to handle all the mounting responsibilities yourself, AGDisplays provides complete open-frame kit configurations, which include the display along with all the necessary cables, controllers, and mounting hardware. These kits are sold unassembled and allow the customer to freely develop their own mounting configuration.
Whether your design calls for standard mounting, or a unique mounting solution, AGDisplays can help secure your display to your enclosure. To learn more, or to find the correct mounting solution for your display design, please visit our website at www.agdisplays.com, or contact us at sales@agdisplays.com.